
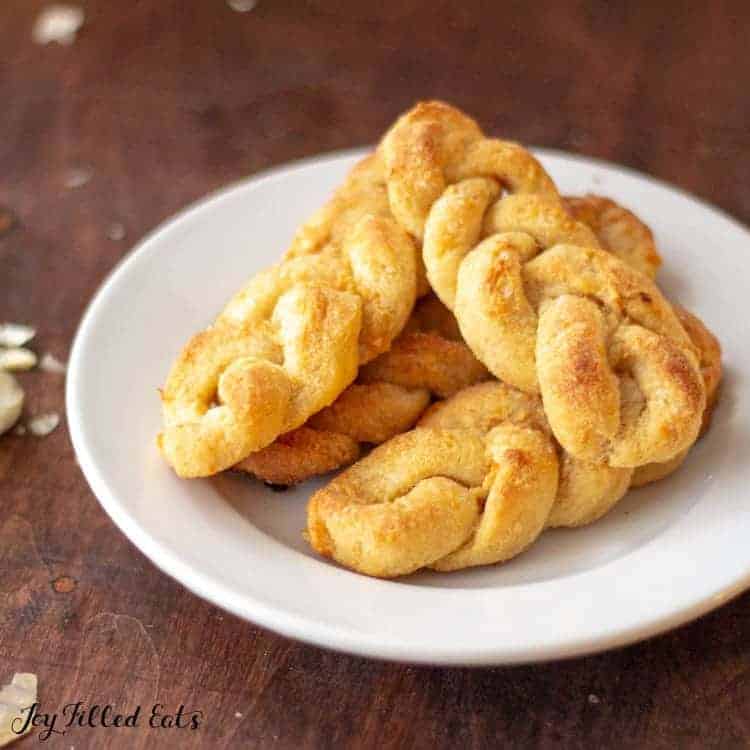
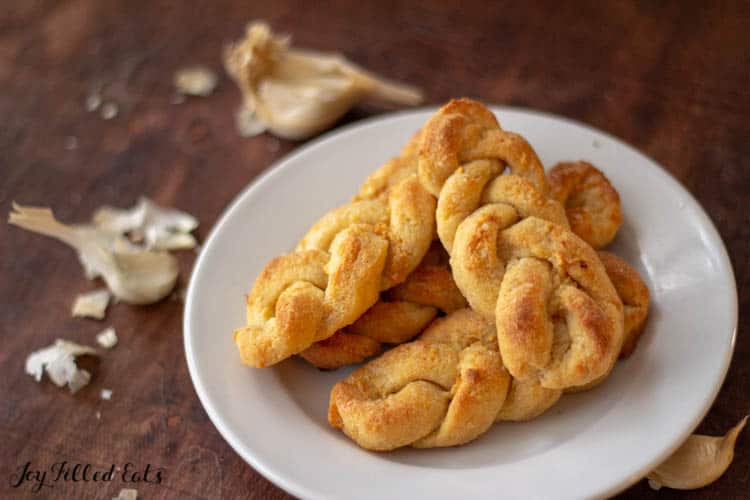
Keto Breadsticks Recipe


This scrumptious buttery and soft keto breadsticks recipe is precisely what you have been waiting for. Every bite is bursting with an amazing garlicky flavor, and they are soft and delightful. Once you taste these braided garlic breadsticks, you won’t even remember what regular breadsticks taste like. This easy recipe is low carb, keto, gluten-free, grain-free, sugar-free, and Trim Healthy Mama friendly.
When I made the switch to low carb and gluten-free, I thought it was the end of me getting to enjoy warm, buttery bread. That made me so SAD! I’m sure once you made the switch, you felt my pain. But, the great news is we don’t have to give up those special comfort foods. We can just transform them into healthier versions and skip all the guilt.
I was on the hunt to find the perfect garlic breadsticks, and I tried a few things that didn’t work out too well. Then born were these keto garlic breadsticks and they are magical. You wouldn’t even know that they were low carb and gluten-free if I didn’t tell you. They are that amazing.
Who Invented Breadsticks?
Just a little history on breadsticks for you, they have been around for a really long time. Their exact history is a little bit foggy. Some say they have been around since the 14th century, while others say there were invented in 1679. Either way, they did originate in Italy and have become a family favorite for many years. There is a baker by the name of Lorenzo Torinese that gets credit for inventing breadsticks.

How To Make Keto Breadsticks:
Step 1: Preheat oven and prepare garlic butter.
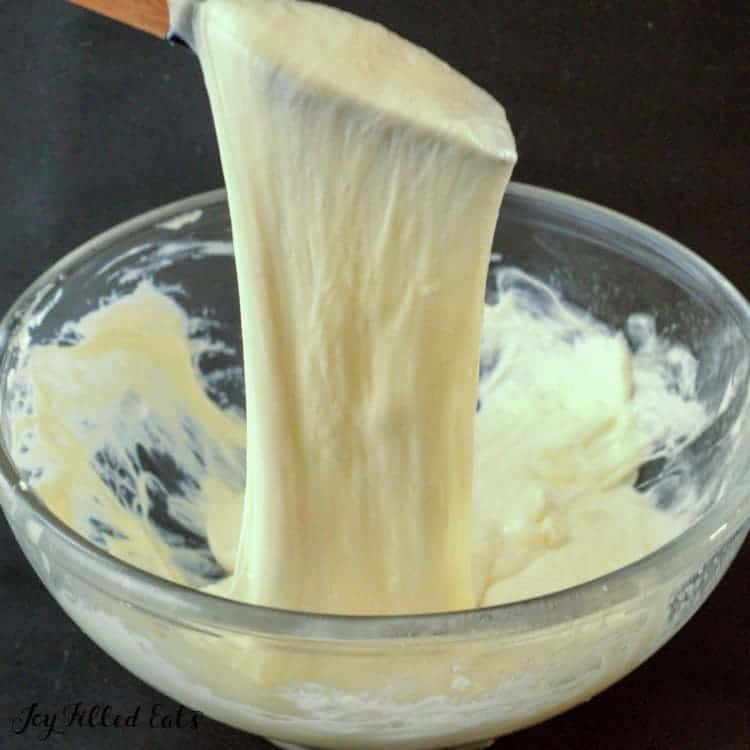
Step 2: Microwave cheese alternating between stirring and heating until it’s completely melted. It should closely resemble cheese fondue.
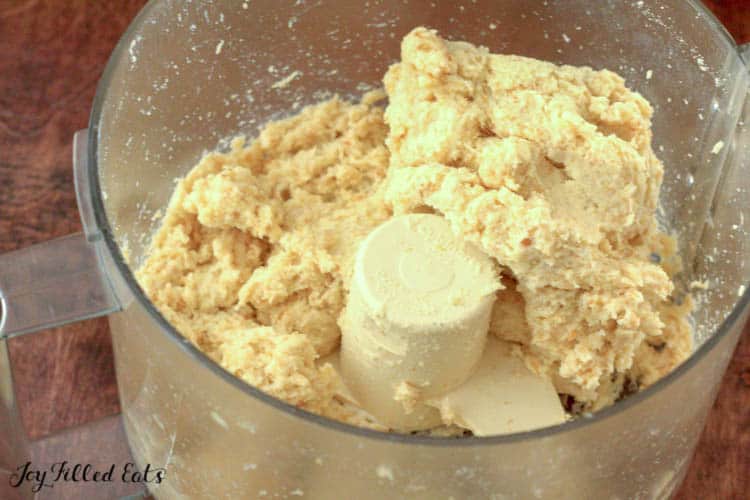
Step 3: Add the egg and dry ingredients to the cheese. Dump the ingredients on wax paper and begin kneading by hand or put it in a food processor until ingredients are incorporated.
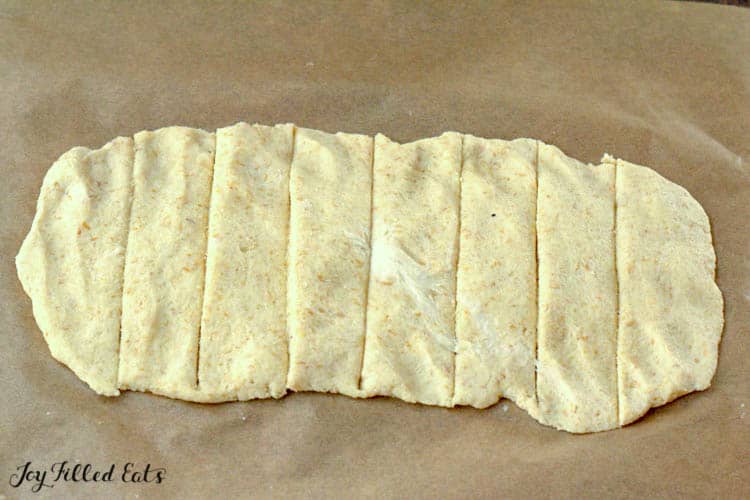
Step 4: Form the breadstick mixture into a large rectangle. Wetting your hands will keep it from sticking as badly.
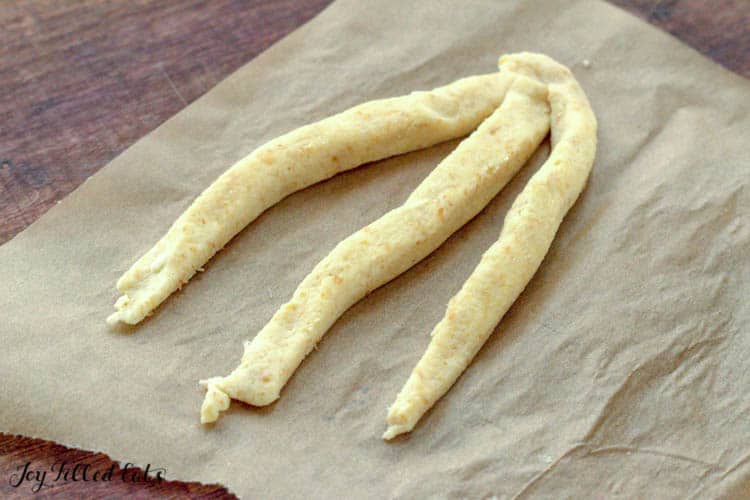
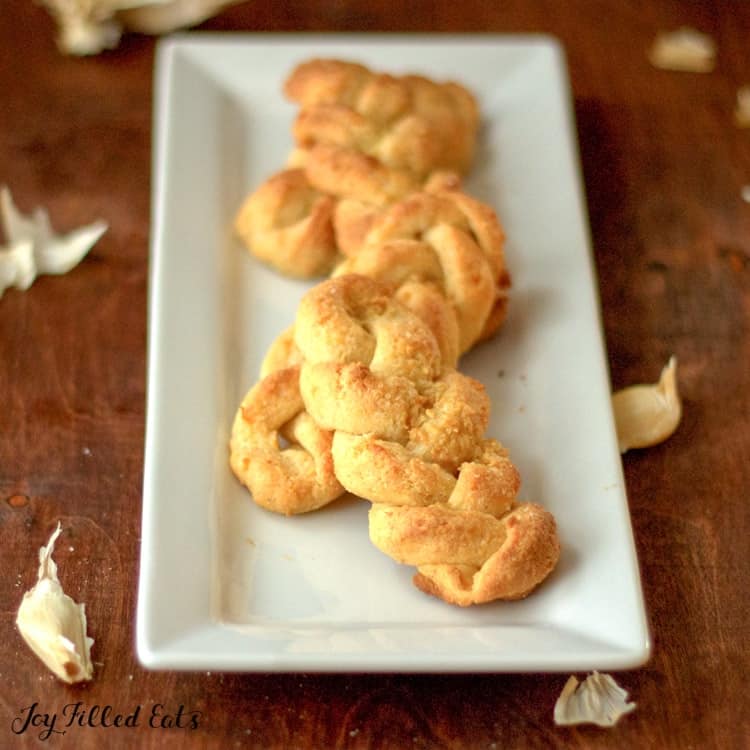
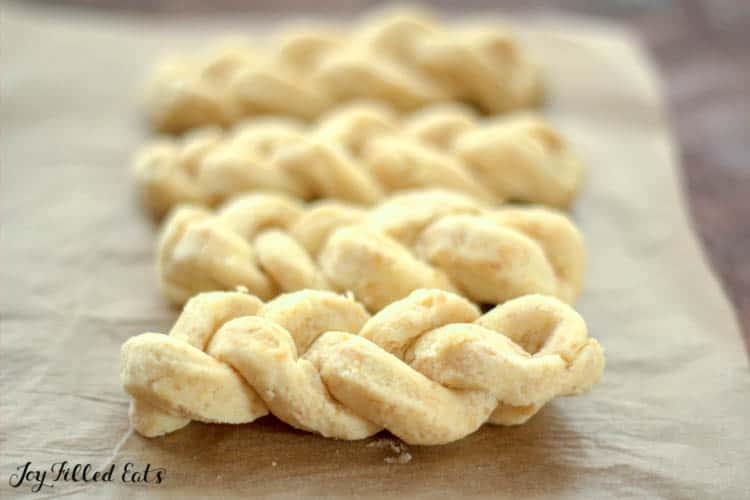
Step 5: Cut the breadsticks into 8 strips, then again into 3 smaller strips. You should have a total of 24 strips of dough. Take 3 strips and attach them at the top. Braid them just like you would hair, attach at the bottom and tuck it underneath.
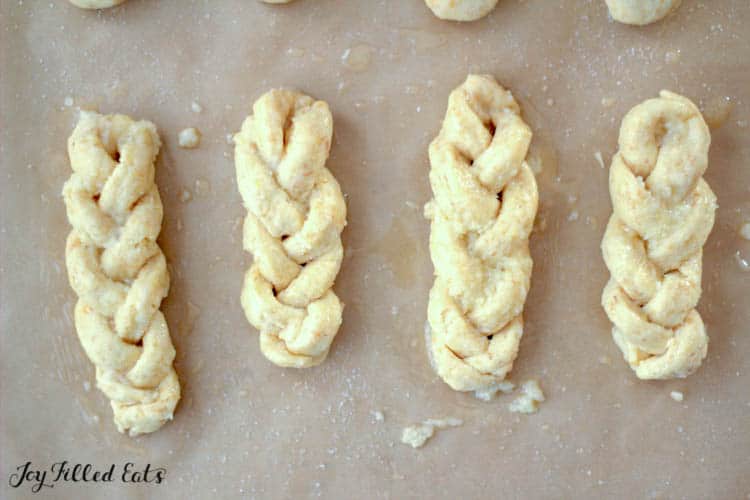
Step 6: Add each braided breadstick to the cookie sheet. You should have a total of 8 braided breadsticks. Use half of the garlic butter and brush it onto the bread dough. Sprinkle with a little bit of salt and bake.
Step 7: Once they are golden brown, they are done. Top with some more garlic butter and serve warm.
How Do You Store Keto Breadsticks?
You should store the cooked keto breadsticks in a plastic storage bag, airtight container, or wrap them with aluminum foil. You want to make sure that air doesn’t get to them because they will not last very long if air does get to them. These breadsticks will last 2-3 days on the counter or in your pantry. You can refrigerate them if you prefer, but they will age faster.
Keep in mind, when you make these garlic breadsticks at home they aren’t loaded with preservatives like the prepacked stuff. This is why they are healthier and taste better, but they may not last as long as the others.
If you notice that they seem super dried out or hard, they have started aging and should be tossed. Also, they may develop mold once they begin going bad too.
Can I Freeze Garlic Breadsticks?
Yes, you can freeze these keto breadsticks. Just wrap them up tightly and place them in an airtight container. To thaw, just place on the counter until they are room temperature. They are better fresh though so I try to make them fresh when possible.
How To Reheat Garlic Cheese Breadsticks
There are a couple of options when it comes to reheating your braided garlic breadsticks. The main goal is to make them warm without drying them out. First, you can heat them in the oven at 350 degrees for 10 – 15 minutes. Keep an eye on them so they don’t heat too long.
The second option is in the microwave. I prefer to place them on a plate with a damp paper towel on top of them. This will keep them moist without being too wet. Microwave for 15-20 seconds them check them. If they are hot, you can serve, or you can warm them for a few more seconds. Microwaving bread can heat them up very quickly, and they will be hard if they get too hot.
What To Serve With Garlic Breadsticks
You can serve pretty much anything with these homemade garlic breadsticks that you wish. Here are some of my favorite meals to eat them with. (They are great for dipping up sauces too)
- Keto Meatballs With Sausage And Ground Beef
- Keto Pizza Casserole
- Baked Shrimp With Garlic
- Chicken Alfredo
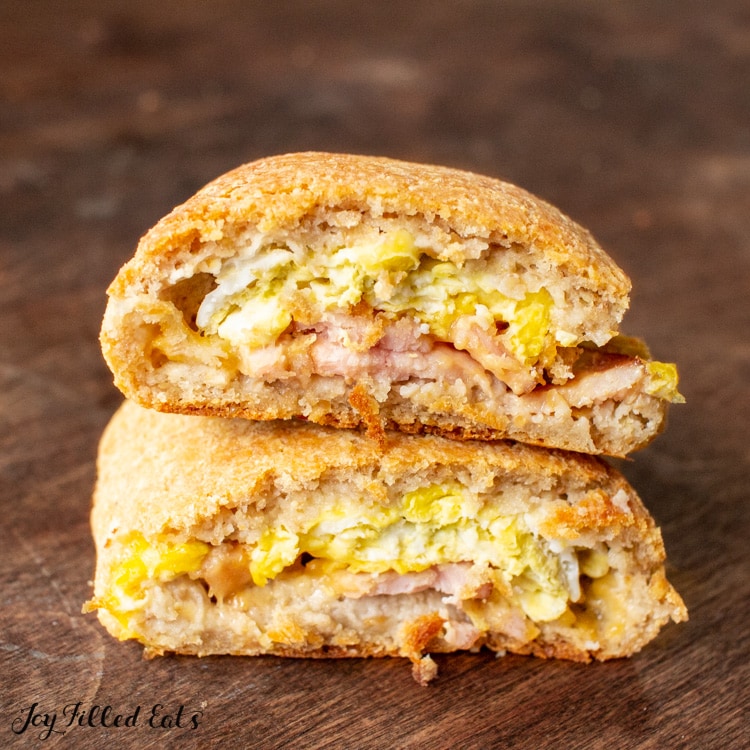
Honestly, these keto breadsticks are so delicious you could even eat them with your breakfast. They are great for dipping into eggs! And try this Psyllium Husk Keto Bread and these Keto Cheesy Breadsticks next!
Like what you see? Follow me on Facebook! Love this recipe? Leave a comment & 5-star rating right here! Make sure you don’t miss new recipes by getting email updates!
Want to Save This Recipe?
Enter your email below & we'll send it to your inbox. Plus get great new recipes from us every week!
By submitting this form, you consent to receive emails from Joy Filled Eats

Braided Garlic Breadsticks
Ingredients
Dough Ingredients:
- 8 oz shredded mozzarella
- 2 oz cream cheese
- 1 egg (room temperature)
- 1/3 cup coconut flour
- 1/3 cup almond flour
- 1/3 cup ground golden flaxseed or additional almond flour
- 2 tsp baking powder
Garlic Butter Topping:
- 2 tbsp butter melted
- 2 cloves of garlic crushed
- pinch of sea salt
Instructions
- Instructions:
- Preheat oven to 400. Combine butter and crushed garlic. Set Aside. Line a cookie sheet with parchment.
- Put cheese in a microwave-safe bowl. Microwave one minute. Stir. Microwave 30 seconds. Stir. At this point, all the cheese should be melted. Microwave 30 more seconds until uniform and gloopy (it should look like cheese fondue at this point). Mix in the egg and dry ingredients. You will need to dump it onto wax paper and knead it by hand to thoroughly incorporate the ingredients or you can do this in a food processor with the dough blade.
- Press into a big rectangle on parchment paper (it helps to wet your hands). Cut into 8 long strips. Cut each strip into 3 smaller strips. You will end up with 24 strips of dough. Attach the tops of 3 strips. Braid the dough. Attach the bottoms and tuck under. Put the braid on a parchment-lined baking sheet. Continue to make 8 braided breadsticks.
- Brush each with the garlic butter (using 1/2 of it now). You want to get some of the little pieces of garlic on them too. Sprinkle a little sea salt on the breadsticks.
- Bake for 15 minutes. Remove from the oven and brush with the rest of the garlic butter. Bake for another 5-10 minutes or until golden brown. Serve warm.
Nutrition
Originally Published March 11, 2016. Revised and Republished August 23, 2019.

Hi again Taryn do you have a bread recipe for a crunchy well cooked like italian bread? Or perhaps we could use your recipe of plated bread twists by double the recipe? What do you think about this suggestion?
No, sorry. I don’t think you could get what you are looking for with that type of dough. I haven’t tried this but this looks close to what you are looking for: https://www.sweetashoney.co/keto-french-baguette-recipe/
I followed the recipe exactly as listed and it was very dry and crumbly. There’s no way I would be able to braid, roll or form. Very frustrating. I ended up warming it up a bit and rolled into bread sticks. Maybe next time I will only use almond flour.
Hmmm… I use this dough all the time for pizza, pastries, and other things. May I ask which brand of coconut flour you used? This should not have been dry or crumbly. Was your mozzarella completely melted like fondue? Did you mix by hand or in a food processor?
Hi, we’re really looking forward to these, they’re baking now. I had some trouble with the process and I think an edit on the recipe might be helpful. I was able to flatten it into a beautiful, big rectangle, but since I’m busy and didn’t read your blog (sorry, such is life) I followed the words “cut lengthwise into 8 steps”rather than the visual which is within the blog body which shows 8 width wise strips. So that was frustrating. I may have put on my math and creative problem solving cap then and cut them all into shorter strips, but instead I washed it all back up into a ball, tried kneading it, but it was too cool and crumbly at that point, so I microwaved 20 seconds, tried again and flattened out an ugly, holy rectangle that was then so hard to work with. It just caused a lot of frustration that was unnecessary. Sorry to be a downer. On a positive side, while they’re not as beautiful as they could’ve been, they smell great in the oven and I know this blend of fathead dough and know it’ll taste great. And I’ve learned, next time I’ll know how to cut it the first time.
I edited the instructions to clarify but really, either way will work. You can have 8 very long strips and then cut each into 3 shorter strips. Or 8 wide strips and cut each into 3 thinner strips.
It states add the eggs, plural? It only states one in the recipe? TIA!
Just one egg. I will fix that!
Hello! I was just curious, how would this work if I did just purely Almond Flour? I don’t have the seed flour and we aren’t a huge fan of coconut flour – but if it makes a big difference, I could just grab some.
Thank you.
Just almond flour should work. Use a bit extra since coconut flour is drier.